Home

Echoes of Ba Sing Se
A friend and I were reminiscing about an old Minecraft server, one that set out to build the entire world of Avatar: The Last Airbender at scale. I have always loved the show, and joined as a player eager to experience the bending systems. In the first instance of what would become a recurring pattern, I talked my way onto the staff within a few weeks. The world was enormous and the team was scattered across it, each person claiming a city or a region. I took the Middle Ring of Ba Sing Se.
For anyone who never watched the show: Ba Sing Se is a walled city of concentric rings. The Middle Ring is, fittingly, where the middle class live. It has parks and open space and room to breathe, but the people there are still reaching for the Inner Ring, where the elites are. It is a district defined by aspiration, and one that has surprisingly little canonical material to base a build on. I grabbed a few screenshots from The Legend of Korra and got started.
The start was my favorite phase: planning. I took in-game maps of the area we had to fill, grabbed a screenshot of them stitched together, and annotated the master plan on top: here are the districts, here is the canal, here are the parks and the rail line. I proudly showed off the plan to the rest of the team and got some good feedback.
Then I started building, and learned very quickly that I was bad at it. The scale was punishing, I was the only person working the ring aside from an engineer who built the train station, and I did not know how to use WorldEdit or VoxelSniper with any real skill. There was no Axiom back then to lean on. A few months in, I burned out completely and dropped the project.
I told myself someone would pick it up. There were plenty of builders on the team, and Ba Sing Se is too important to the story to leave half-finished.
Getting back in
The curiosity had been sitting with me for a while. I wanted to see what the city had become, and to be honest I wanted to know if anyone still remembered me. After all, I am still on the staff render on their website a decade later.
Getting a ten-year-old client running was its own small ordeal. Perhaps it was a bad sign that the server had barely updated its Minecraft version after all this time. I tried a modpack for 1.12.2 and could not get it to launch. I fell back to vanilla 1.12.2, which also refused to start until I tracked down and installed an older build of Java. After that it finally came up, though without any of the mods I now take for granted. No minimap. No world map. Just the bare client and a city I half-remembered.
I signed in. Nobody was online. The game did not have anything saved from ten years ago, so I made a new character (earthbender, of course), and spawned into the Inner Ring of Ba Sing Se.
A liminal city
The Inner Ring palace looked about how I remembered, which wasn't too surprising since that area was basically finished ten years ago too. From there I first teleported to the Outer Ring, which had wool scattered across the ground to mark where future houses would go (or maybe it was a grief someone left behind; it was hard to say). The whole place felt like a liminal space, the kind of half-built yet oddly dense environment that feels wrong to stand in. I got lost trying to navigate it on foot, gave up, and teleported back to the palace just to reorient myself.
From there I made my way outward, toward the ring I was sure I would barely recognize.
Nothing had changed
I took the train (local fast travel) into the Middle Ring. When I stepped off at the station, I was looking at a vast empty expanse. It did not fully land until I saw one of my own signs, all caps, marking the start of a district exactly where I had placed it in 2015.
The parks were still there. The bending arena I built, the fountain I had enjoyed making, both still standing. The rail line I designed was still encircling the ring, carrying players across a district that was otherwise empty. The same flat, open nothing stretched out between the landmarks, the same depressing absence that was there the day I quit. Some haphazard player-built houses had gone up here and there, evidence that regular players had been allowed to build in the ring at some point, but it was nowhere near enough to fill the space.
In ten years, the only thing anyone had changed was that they removed my canals.
I suspect they caused problems. A canal is an obstacle, and rather than build bridges or stairs across them, someone filled them in. I understand the reasoning. It still stung that of everything I left behind, the one edit anyone made was to delete a feature that was actually in the source material.
The guilt
I had assumed, when I walked away, that the importance of Ba Sing Se would pull another builder into the gap I left. It never did. Everyone stayed on their own corner of the world, and the Middle Ring just sat there, frozen at the exact moment I lost the will to keep going.
Standing in it ten years later, the feeling was complicated. There was guilt, the plain kind, because the ring was unfinished and that traced directly back to my absence. There was also the honest acknowledgment that I never would have finished it alone, that burning out was probably inevitable given the scale and the tools I had. And underneath both of those, there was a bit of amazement. Blocks I placed a decade ago were still exactly where I put them. Signs in my own handwriting, so to speak, untouched. The ring in this state was both a monument to my failure and proof that I had once been there at all.
The long way to Secret Tunnel
I wanted to find my old personal base. I knew it was somewhere near Omashu, but not exactly where, and this server has a deliberately strict fast-travel system. You cannot warp anywhere you like. Each node only connects to the ones adjacent to it, and the method changes as you go: walk to a train station, ride to a node, find a sand sail ship, ride that to the next node, repeat. It took roughly 45 tedious minutes of hopping between transit methods before I found it.
The base is called Secret Tunnel, based on an infamous location in the show. The entrance is an arched doorway near the top of a sandy mountain, and once you step through, the build opens into a deep vertical shaft with rooms and staircases winding around the edges, descending to a pool of water at the bottom.
To my surprise, people had been here while I was gone! There were signs left by strangers: "X was here 2018," "Y was here 2021," years of visitors I never met. My land claim had long since expired and been claimed by someone else, so I could not open a single chest. But those signs got to me in a good way. They meant people had found this place, thought it was worth marking, treated it as a hidden spot the community found interesting. At least back when there was a community to find it.
I tried to jump down the shaft to land in the water at the bottom. I missed, hit the floor, and died. I respawned back in Ba Sing Se.
It was late, and I did not feel like making the 45-minute trek again to leave a sign of my own. Maybe one day I'll go back and add a note from the founder next to those from the visitors. Though I doubt anyone is left to read it.
Become Alone
During my whole session, nobody else came online. That part genuinely saddened me, because there was a pride event running on the server, and I had expected at least one other person to be around for it. Maybe the small group that remains plays together only at set times. Maybe there is no group left. I wanted someone to talk to about the state of the place, and there was no one.
When I finally went to log off, I noticed they had retextured the disconnect button. It no longer says "Disconnect." It says "Become Alone."
I do not know what it references from the show, if anything. I discovered it in that exact moment, reaching to leave. It felt unbearably appropriate for the state the server was in.
I clicked it.
If you ever played on a server like this, you have probably felt something similar. A world that a community poured years into, still standing, still loadable, still technically there, with almost nobody left inside it. My corner of it is exactly as I left it, which is somehow both the best and the worst outcome I could have found. The work outlasted the people. The work was never finished.

Luminous & Exalted Phanpy Line
Luminous variants of Phanpy and Donphan with pink skin and blue guards.
Exalted variants of Phanpy and Donphan with white skin and glowing purple guards.
Originally made for Callisto shiny variants.
Cobblemon Ambient NPC Behaviours
Three "atmosphere" behaviours for Cobblemon NPCs, plus an invisible Ambient preset that can easily uplift any scene. On their own, NPCs stand still and silent, so my goal for these behaviours was to add subtle sound and visual effects that make a setting feel more lively. Each one is added to an NPC, toggled on, and configured from the in-game editor (/npcedit) without writing any scripts.
Ambient Sound Loop
Plays an ambient sound on a configured interval, broadcast from the NPC's position so players nearby hear it with proper directional falloff. Up to three sound ids can be configured (ambient_sound_id_1 through _3), and each fire picks one non-blank slot at random. Volume and pitch are each rolled per fire between a configurable min and max, so a repeated clip does not sound mechanical.
A few details that make it usable in practice:
- Sound channel:
ambient_sound_channel(defaultambient) sets which volume slider the sound obeys, so an effect can route throughblock,music, orvoiceinstead. - Interval jitter: the gap is
ambient_sound_interval_ticksplus a random0..ambient_sound_jitter_ticks. As such, two identical NPCs placed together drift out of sync instead of chorusing. - Activation radius: the sound broadcasts to players within the engine's fixed 16-block radius, so
ambient_sound_player_radiusis an activation gate rather than the audible distance. It defaults to 16 to keep the gate aligned with who can actually hear it.
Idle Animation Cycler
Periodically plays a weighted random idle animation (wave, look_around, stretch, yawn, or whatever the model defines) so an NPC that is standing around does something every so often. Up to five animation slots are configurable, each with its own pick weight (idle_anim_weight_N), and each fire runs a cumulative weighted roll over the non-blank slots. The gap is a random value between idle_anim_interval_min_ticks and idle_anim_interval_max_ticks.
A busy gate keeps the cycler out of the way of anything more important. It checks three cheap conditions before firing and skips the cycle if any is true:
q.entity.has_walk_target: the NPC is walking somewhere.q.entity.is_in_dialogue(): a player is talking to it.q.entity.is_in_battle(): it is mid-battle.
As such, this behaviour composes well with moves_to_players, stays_at_current_position, and the Dialogue Behaviours, so the NPC tracks the player, emotes between conversations, and goes still the moment someone interacts.
Ambient Particle Emitter
Emits a bedrock (snowstorm) particle effect on a configurable interval from a point near the NPC. Up to three particle ids can be configured (ambient_particles_id_1 through _3), one picked at random each fire. The emission point is an offset (ambient_particles_x/y/z) from the NPC's current position, so the cloud follows a moving NPC, and the default y = 1.0 lifts particles off the feet to around body height.
The underlying spawn call takes a single point, with no native count or spread, so two parameters are layered on top in Molang:
- Count:
ambient_particles_countspawns that many instances per fire in a loop. - Spread: each instance is scattered by a random value within
±ambient_particles_dx/dy/dz, so a single point becomes a box-shaped cloud. Every instance in one fire shares the same picked particle id.
Shared Features
All three share the same tick-and-emit skeleton, which is what keeps them cheap on a populated server:
- Player activation radius: the tick does real work only while a player is within the configured radius. An unvisited NPC costs one data read and one compare per tick, so a map full of ambient emitters stays light until someone walks up.
- Restart-safe cadence: the next-fire time is persisted on the entity (
q.entity.data.ambient_sound_next_tickand the equivalents) as a monotonicgame_timevalue, so the schedule survives a server restart. - Pause condition: each exposes an optional Molang gate (
*_paused_condition) that skips a cycle when it assignsv.result = true. Using this gate you could make an effect pause depending on the time of day, weather, or even the state of other NPCs. - Back-off when idle: when nobody is in range, or the pause gate trips, the next check is scheduled about a second out instead of every tick.
The Ambient preset
The Ambient preset is an invisible NPC designed as a drop-in solution to uplift a scene with these behaviours. It uses the cobblemon:puzzle resource with the invis variation, hides its nametag, disables gravity, and ships with both ambient_sound_loop and ambient_particle_emitter already applied (alongside core, set_entity_properties, a small quarter_cube_hitbox, and a no-op interaction). It does not despawn.
The point is a marker a server owner can drop anywhere, enable the sound and/or particle channels on, and configure in place. Because the NPC is invisible and stationary, it layers onto an existing build without adding a model.
The Idle Animation Cycler is left off the preset, since an invisible NPC has no animations to play. It is meant to be added to a visible NPC directly, such as a Pokemon or Simple Dialogue NPC.
Techy Stuff
- Built on Cobblemon's behaviour and Molang systems, declared in JSON and dispatched through
run_scripttasks on theminecraft:idleactivity. - Each behaviour pairs a
*_tickscript with anundoscript, so toggling a variable re-applies cleanly on save and removing the behaviour tears down its state. - Random slot selection uses
math.random_integer. The cycler's weighting is a sum-and-roll over the per-slot weights, with a float-edge fallback guarding the exact upper boundary. - Sound and particle ids and animation names run through the shared
replace_placeholders_varhelper, so{{npc}}resolves the same way it does in the animation-interaction and dialogue behaviours. - The Ambient preset is a single NPC JSON (
apply_behaviours) that composes the existing emitter behaviours, so it inherits any fixes or variables they gain later.
Built for the Cobblewilds Cobblemon server, but available for commission.

Luminous & Exalted Swinub Line
Luminous variants of Swinub, Piloswine and Mamoswine with icy blue and white fur.
Exalted variants of Swinub, Piloswine and Mamoswine with dark fur and glowing amythest tusks.
Originally made for Callisto shiny variants.
Cobblemon Moving Platform NPCs
An autonomous Cobblemon NPC that moves along a configured path through the world on its own schedule. Players stand on it, ride along, and step off whenever they want. It builds on the same solid-block-lift-and-place trick the Puzzle Rock uses, but is driven by a tick loop instead of player interaction. The intended use is to transport the player across gaps or to be activated/deactivated as part of a puzzle.
What it does
The NPC comes in two sizes: a 1x1x1 single block and a 2x1x2 wide platform. Both follow the same logic:
- Waypoint path:
path_waypointsis a semicolon-separated string of absolute world coordinates. Example:"100,64,200;110,64,200;110,64,210". The platform steps toward the current waypoint atpath_tick_interval(default every 10 ticks), pauses forpath_pause_at_waypoint_tickson arrival, then advances. - Loop modes:
loop(wrap to start),pingpong(reverse direction at ends), oronce(stop at last waypoint). - Per-step shape: multi-axis paths interpolate diagonally instead of stepping one axis at a time. A path from
(0,0,0)to(5,5,5)takes 5 steps rather than 15. - Activation radius:
path_player_radius(default 32) gates ticking on whether at least one player is nearby. - Pause condition:
path_paused_conditionis a Molang gate string. If it evaluatesv.result = true, the platform skips the tick. This is the hook for redstone-controlled stops, quest gating, or scoreboard-based pauses. - Blocked behaviour: when the next position is obstructed,
wait(stop until clear) orskip(advance to the next waypoint). - On-waypoint callbacks:
on_waypoint_commandandon_waypoint_script, both with a{{waypoint_index}}placeholder, fire each time the platform arrives. Useful for triggering doors or puzzle elements, playing a sound at a stop, or even activating another platform.
A reset interaction is built in. A perm-and-item-gated right-click sends the platform back to spawn and resets the waypoint index. Optional on_reset_command and on_reset_script hooks fire alongside.
Use cases
- Elevators: vertical 2-waypoint path,
pingpongmode, apause_at_waypoint_tickslong enough for a player to step off, withon_waypoint_commandopening the floor door. - Conveyor floors: long horizontal path with
is_wideon, a fast tick interval, and a loop. Players ride from one side of a room to the other. - Cutscene rails:
oncemode withon_waypoint_commandtriggers at each beat. The platform delivers the player to a vantage point and then fires the scripted event when it arrives. - Sokoban-style ferries:
is_solidtrue plus a redstone-gated pause condition lets a player operate the platform from a switch elsewhere in the puzzle.
How players actually ride it
This was the part that took the most iteration. The NPC itself is not solid, and instead relies on placing solid blocks at its next position to hold the player up. A player who knows this and is quick enough could just keep walking forward to be on the platform all the time, but one wrong move would cause them to appear to fall through the NPC. I tried two alternatives: teleporting the player with the NPC, or applying velocity to the player with Journey's q.player.push.
Teleporting worked, but felt very jarring. The player could not freely move about the top of the platform, as the platform continually reset their position and even their camera rotation. This made it quite difficult to look around or leave the platform in the direction you wished. I found pushing to be much more comfortable. You can look around and walk in any direction on the platform because the velocity from q.player.push is additive to your existing velocity. If you time it right, you can even jump forward and get a boost from the push!
As such, the platform pushes the player via q.player.push in the direction of platform travel each step instead of teleporting them. path_rider_push_strength is tunable so per-step drift roughly matches the platform's per-step distance. Care should be taken with this value, since pushing too hard causes the player to slide off and pushing too softly causes the platform to leave them behind.
Techy Stuff
- Built on Cobblemon's NPC, behaviour, and Molang systems, configured in JSON.
- Tick loop runs as an
add_tasks_to_activitytask onminecraft:idlepriority 0. The activation radius and tick interval are enforced inside the script rather than via Minecraft's brain priorities. - Solid-block management reuses the
cobblemon:get_block_on_npcandcobblemon:set_block_on_npchelpers from the puzzle rock, extended with anis_widebranch alongside the existing pillar branch. As such, all three footprints (cube, pillar, wide) share one code path. - Waypoint string parsing is cached in
q.entity.dataand only re-parsed when the config string changes. The tick loop does not re-tokenize every tick. - Models and textures built in Blockbench. Presets ship for the most common shapes so a server owner can drop one in without modeling.
Built for the Callisto and Cobblewilds Cobblemon servers, but available for commission.

Luminous & Exalted Qwilfish Line
Luminous variants of Qwilfish and Overqwil with deep navy and bright cyan scales.
Exalted variants of Qwilfish and Overqwil with crimson and orange flame-like spines.
Originally made for Callisto shiny variants.
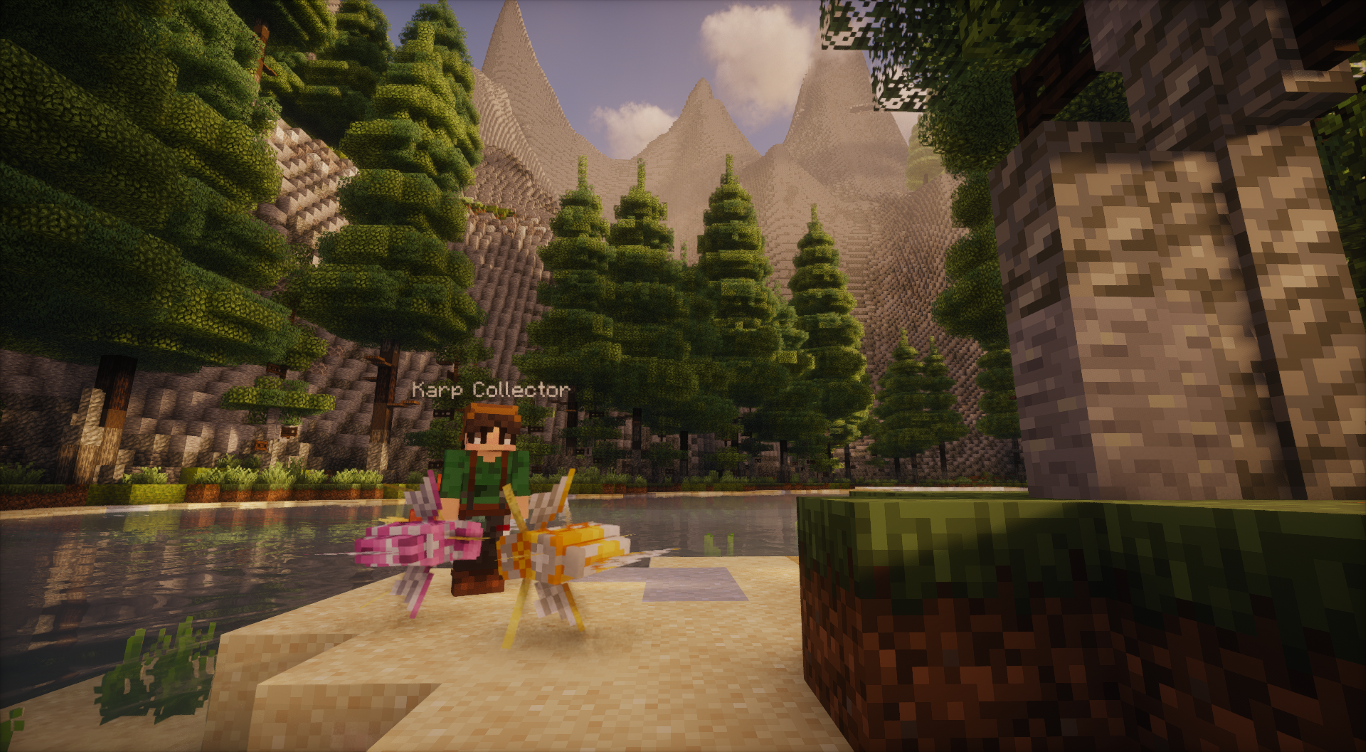
Cobblemon Karp of the Week NPC
A weekly Cobblemon quest built around the 31 Magikarp Jump forms. The Karp Collector NPC picks a form for the player each week, gives them a biome hint and a Journey task, and trades them 'Karp Coins' (KC) and shop unlocks when they bring the right karp back. Lifetime progress is tracked through milestone titles and cosmetic/tool unlocks. I made it to give players more of a reason to collect all 31 forms, and to add content specifically tied to fishing, which is usually my favorite activity in any game that adds it!
First visit
The Karp Collector NPC offers a starter quest the first time the player interacts with it: bring me one normal Magikarp. On submission, the player receives 10KC, access to the shop, a warp unlock to the Collector's location, and entry to the weekly loop.
Weekly loop
Each week, the Collector picks a Jump form for the player. Selection prioritizes forms the player has not yet submitted. Once all 31 normal forms are in, selection switches to forms the player has not yet submitted a shiny version of. The player is given:
- A description of the karp's appearance.
- A biome hint pointing them toward where to find it.
- A Journey task auto-assigned for tracking in
/journal.
On submission, the Collector trades the player 5KC for a normal Magikarp, or 25KC for a shiny one. The form's trophy is also unlocked in the shop. Shiny submissions unlock both the normal and shiny trophies for that form.
The week resets at Sunday 00:00 server time for all players simultaneously. The default is UTC, but the timezone can be adjusted with an offset.
Rewards
The Karp Collector's shop is buy-only and gated by permissions granted as the player progresses. It is implemented in SkiesGUIs. The cosmetics and tools listed below are placeholders rather than functional items. (at time of writing)
- Trophies (62 total, one per form, normal and shiny):
- Normal: 4KC
- Shiny: 20KC
- Resources (ungated):
$1k: 1KCIV Candy: 1KC
- Cosmetics (unlocked at 5/10/15/20 unique forms submitted):
- Fishing Boots: 4KC
- Fishing Waders: 8KC
- Fishing Vest: 12KC
- Fishing Hat: 16KC
- Tools:
- Karp Rod: 20KC (unlocked at all 31 normal forms submitted)
- Prismatic Rod: 40KC (unlocked at all 31 shiny forms submitted)
Titles
Lifetime weekly completions award milestone titles:
title.fisheron the first normal submission.title.angleron the first shiny submission.title.karp_collectorfor all 31 normal forms.title.karp_connoisseurfor all 31 shiny forms.title.karp_cadet/crewman/commander/captain/colonel/kingat 5, 10, 20, 30, 45, and 60 weekly completions.
Fish tank
A fish tank is built behind the Collector. As the player submits each form, that exact karp variant appears swimming in the tank, visible only to them via per-player NPC visibility. A completionist's tank shows all 31 forms swimming in their own personalized aquarium.
It should be noted that the fish tank can ship after the core quest, since the gating permission (npc.kotw.submitted.<aspect>) is set on submission whether or not any tank NPCs exist yet.
Special tools
The Karp Rod and Prismatic Rod are aspirational long-term goals, not yet implemented:
- Karp Rod: Boosts the chance of reeling in a Jump form. Doubles the shiny chance on reeled-in Magikarps.
- Prismatic Rod: Never reels in Magikarps. Doubles the shiny chance on every other reeled-in species.
These are intended to be rare endgame items. The Prismatic Rod especially requires every shiny form to unlock, which will take a dedicated player a year or more.
Techy Stuff
- Built on Cobblemon's NPC, dialogue, and behaviour systems, configured in JSON.
- Quest logic written in Molang. The weekly reset is gated by a
next_reset_datestring inq.player.datacompared againstq.date_is_after, rather than a server-wide cron job. - Form selection draws from the player's un-unlocked pool first, falling back to shinies-only once all normals are in, and then to anything once both sets are complete.
- Server-side dependencies: Journey (task tracking and per-player visibility), LuckPerms (progression gates), Impactor (
karp_coinscurrency), and SkiesGUIs (shop interface). - Trophies, the
Karp Coinitem, and the aquarium NPCs are modeled and textured in Blockbench as filament assets, served through Polymer so vanilla clients see them without installing a resourcepack.
It should be noted that the Fishing Cosmetics and Special Rods cannot be implemented purely via datapack and require a dedicated companion mod. Servers that do not want to install a sidemod can still ship the entire core quest, the shop, all 62 trophies, the titles, and the milestone system.
Built for the Callisto and Cobblewilds Cobblemon servers, but available for commission.

Luminous & Exalted Pineco Line
Luminous variants of Pineco and Forretress with brown bark.
Exalted variants of Pineco and Forretress with bright purple bark and glowing core.
Originally made for Callisto shiny variants.
Cobblemon Puzzle Rock & Pillar NPCs
A pair of NPCs meant for Sakoban-style puzzles similar to those found in the mainline Pokemon games. The Puzzle Rock is a 1-block cube; the Puzzle Pillar is its 2-block-tall sibling. Both share the same behaviour, the same dialogue, and the same configuration surface — they differ only in model, hitbox, and the extra block of headroom the pillar checks for when it moves. They can also be configured to move multiple blocks at once, to allow for ice block puzzles.
What it does
Right-clicking a puzzle NPC pushes it in the direction the player is facing on the world grid. Shift+right-click opens a menu instead:
- Rotate Clockwise / Counterclockwise — turn the NPC by a configurable number of degrees.
degrees_to_rotatesupports negative values, so a server owner can pick any snap step. - Ride — mount the NPC. Useful when the rock is solid and the puzzle wants the player to travel with it.
- Reset — return the NPC to its
home_x/y/zposition andreset_rotation_degreesrotation, and teleport the player back to a savedplayer_reset_x/y/zspot. - Close — dismiss the menu.
Push, rotate, ride, and reset are each independently toggleable, and each can be gated behind a permission node, a held item, or both. The same NPC can swap state on the fly based on the player's actions or the puzzle's progress.
What you can build with it
- Shrine puzzles — set a
goal_pos_x/y/z(and optionallygoal_rotation_degrees) and anon_goal_commandoron_goal_script. When the NPC comes to rest at the goal, the configured command or script fires — unlocking a door, granting an item, spawning a Pokémon, whatever the server owner wires up. - Movable terrain — turn
is_solidon and the NPC places apuzzle_rock_solid_block(defaultminecraft:barrier) under itself whenever it stops, so players can walk across a moving floor. Turnis_floatingon and it stops falling when there's nothing beneath it — useful for skybridge puzzles. - Sokoban-style rooms — combine pushability with a goal state and a visible solid block, and players solve box-pushing puzzles where the floor itself becomes the puzzle.
- Gym puzzles — the pillar variant reads as a stone column in a Pokémon gym; players push and rotate it into a goal position to progress the room.
What's different about the pillar
The pillar is the same NPC under the hood — same behaviour, same resolver — flagged with is_puzzle_pillar: true in its ai block. That flag changes one thing: the pushability check looks two blocks above the destination instead of one, so the pillar refuses to slide into a 1-block-tall gap. Visually, it swaps the cube.geo model and puzzle_rock.png texture for pillar.geo and puzzle_pillar.png, both resolved through the shared cobblemon:puzzle variation file.
A third aspect, invis, swaps the texture for a fully transparent one — useful when the puzzle relies on an invisible blocker or the NPC is configured to place visible solid blocks.
The goal-state mechanic
The goal-state config is what separates these NPCs from the cannon. The cannon launches; the puzzle rock resolves. Every push and every rotation re-checks the goal:
- If
goal_enabledisfalse, nothing fires. - If a goal coordinate is left at
0, that axis is wildcarded — the NPC can sit anywhere along it and still pass. - If
goal_rotation_degreesis left at0, rotation is wildcarded too. - When all enabled checks match, the NPC fires
on_goal_command(a vanilla/-command) and/oron_goal_script(a Molang script).
Care should be taken when setting goal coordinates, since 0 doubles as both "wildcard" and "the actual block at world origin". For shrines built far from spawn this is rarely an issue, but a puzzle placed near (0, 0, 0) should pick a deliberate non-zero goal — or be moved.
Techy Stuff
- Built on Cobblemon's NPC, behaviour, and dialogue systems (all configured in JSON).
- Interaction logic written in Molang, Bedrock's lightweight scripting language.
puzzle_rock_interaction.molangreads the NPC's permission, item, and toggle config, runscobblemon:move_when_pushedif the player passes, and otherwise emits a debug message and returns early. - Models and textures built in Blockbench:
cube.geofor the rock,pillar.geofor the pillar, both rendered through Cobblemon's poser system. - Solid mode swaps in a configurable
puzzle_rock_solid_blockas the NPC moves, so the player can stand on top without the rock falling out from under them.
Built for the Callisto and Cobblewilds Cobblemon servers, but available for commission.
Cobblemon NPC Animation Interaction
A reusable Cobblemon NPC behaviour that plays an animation, a sound, outputs a chat line, and spawns a particle effect when a player right-clicks the NPC. Each of the four channels has its own configurable delay, so a server owner can choreograph the timing without writing any Molang. Drop the behaviour onto any NPC, set the variables in the in-game editor, and the NPC starts emoting.
What it does
Right-clicking the NPC fires up to four things, all optional:
- Animation: plays a named animation on the NPC's poser. The default is
wave. Server owners can set any animation defined on the NPC's model. - Sound: plays a server-side sound at the NPC's position with configurable volume and pitch.
- Chat line: sends a styled message to the player. The default is " waves at you." in gray. Supports
{{npc}}and{{player}}placeholders. - Particles: spawns a bedrock particle effect at a configurable XYZ position (default: NPC's position).
Each channel can be disabled by leaving its config blank. The four delays are independent, so each can be fine-tuned separately to activate at the exact right moment. All of this is done by tweaking numbers in the NPC editor. (/npcedit)
Use cases
- Greeters: a wave animation and a friendly chat line for shopkeepers, NPCs at warps, or quest givers between dialogue states.
- Reaction emotes: a Pokémon NPC that bounces and emits sparkle particles when patted, with a quick chat caption.
- One-shot cutscene beats: chain delays to time a flourish.
- Interactive set dressing: an NPC at a cluttered desk that plays a rummage animation and a paper-shuffle sound.
Cooldowns and the "seen" perm
Two pieces of state make the behaviour shippable on a busy server:
- Per-player cooldown: configurable in seconds, default 3. Stored as a millisecond timestamp on a per-NPC variable on the player, so spamming one NPC does not lock out another.
- Seen permission: the first time a player triggers the interaction, an LP perm is granted. The default is
npc.anim_interact.seen.{{npc}}_interact_anim. Other behaviours can branch on it. As such, a dialogue NPC can say "oh, we've met" once the player has seen the wave animation.
Techy Stuff
- Built on Cobblemon's behaviour and Molang systems. Declared in JSON, dispatched through
set_script_interaction. - Each of the four channels runs through
q.npc.run_molang_after(...). The Molang string is parsed once and scheduled, so the script does not block waiting for a sleep. - Chat messages route through a shared
cobblemon:print_and_tellhelper. Placeholder substitution usescobblemon:replace_placeholdersandcobblemon:replace_placeholders_var, the same helpers the dialogue and trade behaviours use. As such,{{npc}}and{{player}}work identically everywhere. - The cooldown reads from
q.player.get_npc_variable(q.npc, 'anim_interact_cooldown'), so the timer is scoped to this NPC for this player.
Built for the Callisto and Cobblewilds Cobblemon servers, but available for commission.

Luminous & Exalted Wynaut Line
Luminous variants of Wynaut and Wobbuffet with bright mint skin.
Exalted variants of Wynaut and Wobbuffet with golden skin and a silver tail.
Originally made for Callisto shiny variants.
Sources and Sinks: Premium Currency on Cobblemon Servers
Back while I was working on Roanoke Diamond, I wrote up an in-depth analysis of their economy and suggested improvements. I focused primarily on their premium currency as method to reward players for their dedication and engagement. These are the lessons I learned:
A single source produces inequality
If a server only has one in-game source of premium currency, whichever players engage with that source will hoard everything. An example is weekly tournaments. They're fun, they're high-effort, and rewarding them with currency makes sense. However, if tournaments are the only repeatable source, the same few competitive players will accumulate large sums while everyone else has zero.
This has cascading effects. New players who want to compete look at the gap and feel locked out before they start. Players uninterested in PvP have no way to participate in the economy at all. Currency loses its meaning as a marker of dedication when only one type of dedication counts.
The lesson is to think about which player archetypes you actually want to reward, and make sure each one has a route in. A reasonable starting set:
- Competitive players: tournament placement and participation.
- Quest runners: weekly tasks, story milestones, dex completion.
- Achievement hunters: vanilla Minecraft advancement triggers, breeding goals.
- Event participants: seasonal events with currency spread across event tasks.
- New players: a tutorial questline that introduces both the server and the currency itself.
A brand-new player should be able to earn enough in their first session to buy something meaningful. That single act of spending teaches the entire economic loop in a way no chat message can.
Pick a weekly target and balance around it
Once multiple sources exist, you need an estimate of how much currency an average engaged player earns per week. This number is the anchor for everything downstream. Without it, sink pricing is guesswork and the economy drifts.
My suggested approach: pick one source (often repeatable weekly quests) and treat it as the baseline. Decide how much that source pays out per week, then size other sources relative to it. Tournament first-place might be worth one week of quests. A seasonal event might be worth two weeks. A dex rank-up might be worth a third.
Sink prices come from the same anchor. A premium cosmetic should feel like a real commitment, maybe two weeks of dedicated play. A high-end decoration block might be three or four. Cheap consumables like ball swappers might be a tenth of a week. If the anchor changes later, everything else has to be re-tuned in proportion.
It should be noted that this calculation only works if you actually log earn and spend data per player. Without that, you're guessing at how the economy feels.
Sinks decide what the currency means
Sources determine who earns the currency. Sinks determine what it stands for.
A cosmetic-only sink (skins, hats, decoration blocks) sends the message that currency is about self-expression and showing off dedication. A gameplay-power sink (rare Pokémon, stat items, shiny boosts) sends the message that currency is about competitive advantage. Most servers want both, and the mix should be deliberate.
Here's what I consider to be a good balance:
- A large and diverse amount of Cosmetic Sinks. Custom skins, hats, decoration blocks. These should make up the bulk of what currency can buy, with prices high enough that completing a set is a long-term goal.
- Convenience sinks are the cheapest tier. Ball swappers, mints, small boosts. These exist so players have something to spend on early and feel a regular sense of "I earned enough to get the thing.". Keeping them cheap helps new players get a basic team built quickly.
- High-power sinks stay rare and expensive. Ability Patches, stat-boosting items, signature Pokémon. Available, but priced so that earning them through gameplay is a real accomplishment.
- Decoration blocks as the prestige tier. If your server supports Polymer or similar custom-block tech, decoration blocks are the perfect endgame sink. They're visible (other players can see them in claims), they're collectible, and they have no upper bound on quantity.
I think there's also a case for keeping at least one category of decoration sold for in-game currency only, with no real-money path. It gives dedicated players something concrete to show for their time that money can't buy.
Utilize your backlog
Servers lucky enough to have many artists making custom textures can often accumulate a backlog of skins that are hard to collect. They come from texture jams, seasonal events, one-off commissions. After the event passes, those skins effectively vanish.
A rotating skin shop is a great way to bring them back. Pick a quarterly rotation, show off the catalog on your website with artist credits, and let players buy what's currently in the rotation. Skins that age out of rotation can move to a permanent shop at a lower price.
This serves several goals at once. Players get a steady stream of new-to-them cosmetics. Artists get visible credit for work that would otherwise sit in a folder. The server gets a recurring reason for players to log in and check what's available. And the existence of the skin shop contextualizes any real-money skin sales (the in-game price acts as an anchor, so a real-money offer reads as a time-saver).
Staying F2P-friendly
The strongest reason to build a real in-game currency economy is that it lets you honestly claim the server is F2P-friendly. Every cosmetic, every boost, every Pokémon. All of it should be reachable through play alone.
This works because it changes the meaning of real-money purchases. Players spending money are buying time and convenience, with full knowledge that the F2P route exists. That is a more comfortable transaction for everyone involved than the version where certain items are paywalled forever.
For these reasons, I'd push back hard against any item being real-money-exclusive. If it can be sold for money, it can be priced in currency too. The cosmetic gacha pack that drops next month should also be available, individually, in the shop later. Holdouts here are where F2P-friendliness quietly erodes.
What I'd build first
If I were standing up this kind of economy on a new server, I'd tackle it in this order:
- Pick the weekly currency target and the anchor source.
- Wire up two or three additional sources at different engagement levels.
- Put one cheap consumable in the shop so new players have an immediate goal.
- Ship the cosmetic shop, even with a tiny inventory.
- Add the website catalog so the shop is browsable from outside the game.
- Iterate on rotation and pricing based on actual earn and spend data.
Everything else (decoration tiers, retroactive milestone rewards, prestige cosmetics) is downstream of having the basic loop running.
The core insight, if there is one: a premium currency is primarily a design tool. The monetization follows from doing the design well.

Luminous & Exalted Murkrow Line
Luminous variants of Murkrow and Honchkrow with bright cyan plumage.
Exalted variants of Murkrow and Honchkrow with grayscale "noir" styling and bright red accents.
Originally made for Callisto shiny variants.

Luminous & Exalted Aipom Line
Luminous variants of Aipom and Ambipom based on Snow Monkeys.
Exalted variants of Aipom and Ambipom with glowing blue fur.
Originally made for Callisto shiny variants.
Cobblemon Model Viewer
Interactive 3D viewport that renders Cobblemon Bedrock models (.geo.json) with their textures and overlay layers. Pass a species and aspects — the resolver automatically selects the right model, base texture, and any emissive or translucent overlays. Drag to rotate · scroll to zoom · auto-rotates.
Resolver system
Resolver JSON files in public/cobblemon/bedrock/pokemon/resolvers/ map aspect combinations to models and textures. Each resolver has an order field; multiple resolvers per species are loaded and sorted by it (lowest = highest priority). Variation matching requires all listed aspects to be present in the active set, preferring more specific matches (more aspects = higher score), with resolver order as a tiebreaker. Layers are typed as emissive, translucent, or emissive + additive (a 0–1 strength number), each resolved to a public URL via cobblemon: namespace stripping.
Bedrock geometry loader
A custom loader parses .geo.json without any third-party Bedrock library:
- Coordinate mapping — Minecraft
+Z southmaps to Three.js−Z, so all Z positions are negated. Bone rotations use(+rx, −ry, −rz)with ZYX Euler order to match Blockbench's internal Z-negated frame (conjugated by an implicit Y180 flip relative to Blockbench's own loader). - Bone hierarchy — each bone becomes a
THREE.Grouppositioned at its pivot. Cube meshes are offset by−pivotso their vertices land at model-space coordinates regardless of nesting depth. Cube-level rotations get their own wrapper group positioned at the cube pivot. - Box-UV unfolding — the side strip follows
[west][front][east][back]order (not the Java skin convention). Bottom-face UV winding is corrected by forcingBL = (x1, z1)and inverting theflipUflag relative to the other faces. mirror_uv— mirrors east/west rects AND flips the U axis on all six faces, matching Blockbench's source behavior. Used on mirrored cubes like Pidgeot's wings and eyes.- Per-face UV — per-face
uv/uv_sizespecs are supported alongside box-UV;inflatepads all six faces outward.
Material and layer blending
Geometry is built once and shared across the base and all overlay layers — only materials differ. Layer blending:
- Base —
alphaTestcutout, depth write enabled. - Emissive — full-bright (not additive);
NormalBlendingwith cutout alpha and no depth write.MeshBasicMaterialis already unlit, soAdditiveBlendingwould only saturate toward white. - Emissive +
additive: <number>—AdditiveBlendingwithopacityset to the 0–1 strength value, scaling how much the layer adds to the scene.opacitymultiplies the source alpha before the GPU blend equation, so it's a direct brightness control with no shader changes needed. Used for Lapras's crystal tips (0.6). - Translucent —
NormalBlendingwith full alpha channel, no depth write.
Hello, World (again)
Welcome to the fourth major iteration of my website! Let's take a quick trip down memory lane:
Version 1: Handwritten HTML, CSS, and JavaScript
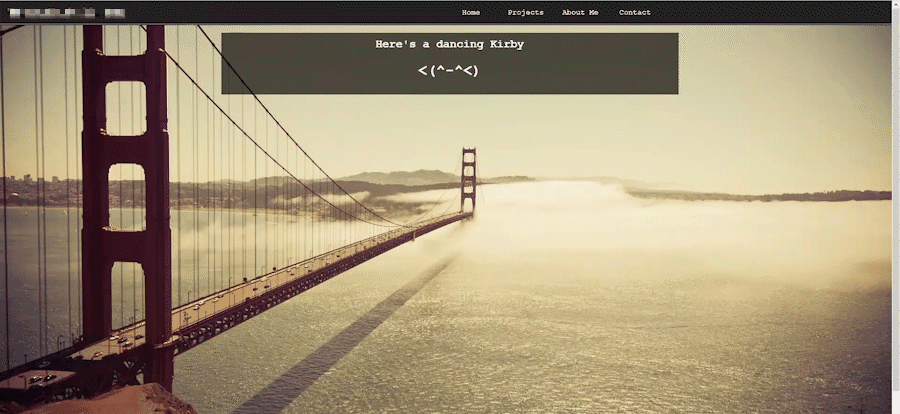
The first version was entirely hand-crafted HTML and CSS, both of which I was pretty new to. I was taking a couple classes on the subject and used this site mainly to test what I was learning. Features included an overcomplicated php blog, a very simple html5 canvas game, and dancing ascii kirby!
Probably the coolest part of this site was that it had a rotating background image. I wrote a python script to change the image at midnight, and then called that python script as a server job. There were even special backgrounds for holidays! I didn't own these images of course, and maintaining my own html/css for every page quickly became too much work for me to update it frequently. After a few years I refreshed it:
Version 2: Static Site via Jekyll
This version was built with jekyll and hosted on github pages. Discovering the world of static website building was amazing, and I didn't even have to pay for hosting now. I grabbed a pretty theme, modified it just enough, and posted my new homepage. This time around I focused on linking music, videos, and websites I enjoyed. The only updating I did was changing the video occasionally.
Version 3: Static Site via Hugo
My motivation this time was to learn hugo and construct a portfolio. I was trying to find my unique style, and you may notice that some of the key design decisions of this current site had their start here!
Version 4: Next.js (current)
We've finally arrived at the site you are currently viewing. I had three motivations for this refresh:
- Use Next.js and Vercel for a more fully-featured React-based stack.
- Showcase all the little things I've worked on that didn't necessarily fit the previous site's big-project focus.
- Surface Cobblemon-specific work that I do for commission.
What's Next?
Expect more little updates as I continue to work on this site and my Cobblemon server projects. Blogs will be few and far between, but I'll try to write them for larger projects that surfaced deeper lessons.
Thanks for visiting, I hope you find something here to love!

Luminous & Exalted Bonsly Line
Luminous variants of Bonsly and Sudowoodo based on the Utah Juniper.
Exalted variants of Bonsly and Sudowoodo based on Glow Berries.
Originally made for Callisto shiny variants.
Cobblemon Cannon NPCs
A custom Cobblemon "Cannon" NPC that players can push, aim, and launch themselves out of. Server owners customize each cannon's appearance and behaviour, so the same NPC fits a Pokémon gym puzzle, a hub-transport launcher, or just a piece of arena dressing.
What it does
Right-clicking a cannon pushes it one tile in the direction the player is facing on the world grid, and can be configured to move multiple blocks at a time. Shift+right-click opens a menu instead:
- Rotate — turn the barrel to the next snapped angle. The rotation increment is configurable per cannon, so a server owner can pick whatever step fits the puzzle.
- Launch — fire the player out along the barrel's current aim.
- Reset — return the cannon to its home position and teleport the player back to a saved spot. Both positions are set by the server owner.
Push, rotate, and launch can each be disabled or gated behind a permission per cannon so the same NPC can act as a decorative prop in one place and a permission-gated fast-travel launcher in another.
What you can build with it
Because each instance is highly customizable, the cannon NPC can take on a lot of different roles:
- Gym puzzles — the type-themed variants exist mostly so a cannon can drop straight into a Pokémon gym whose puzzle is built around aiming and launching the player.
- Movable puzzles — push and rotate together let players solve room-scale puzzles by lining the cannon up and firing themselves through gaps or onto otherwise-unreachable platforms.
- Hub transport — a cannon at spawn that launches players toward a distant area replaces a long walk with a satisfying arc.
- Decoration — the type-themed reskins make it easy to match a cannon to a gym, biome, or themed build without commissioning new art.
Type variants by Croix
The cannon ships with one base "circus" form and 18 beautiful Pokémon-type repaints, all made by Croix. The variants exist primarily so the cannon can be dropped into a Pokémon gym puzzle and immediately read as part of that gym's type. The base model only had to be unwrapped once; every type variant slots into the same atlas.
The trajectory math
The trickiest part of the project turned out to be the physics. Computing the right launch velocity for a given barrel angle is ordinary 2D projectile motion, until you remember that Minecraft's coordinate system is right-handed, meaning Z increases as you go south rather than north. I had to apply the cannon's current rotation to the player, and then derive the correct forward vector inside that convention rather than the one a high-school trig class assumes. It was a nice excuse to actually reach for a bit of geometry and linear algebra in a creative project.
Tech
- Built on top of Cobblemon, the Pokémon mod for Minecraft, using its built-in NPC, behaviour, and dialogue systems (all configured in JSON).
- Core push / rotate / launch logic written in Molang, Bedrock's lightweight scripting language.
- Model and animations built in Blockbench as a Bedrock geometry, with idle / fuse / shoot animations driven by Cobblemon's poser system.
- Requires the Journey mod, which supplies the functions to launch the player, as well as apply the fall-damage-immunity buff so the player survives the landing.
Built for the Callisto and Cobblewilds Cobblemon servers, but available for commission.

Luminous & Exalted Natu Line
Luminous variants of Natu and Xatu with bright red and yellow plumage.
Exalted variants of Natu and Xatu with gilded plumage and glowing eyes.
Originally made for Callisto shiny variants.
Cobblemon NPC Dialogue System
A composable dialogue system for Cobblemon NPCs. Two base behaviours handle the conversation itself: Simple Dialogue for one of two lines, and Long Dialogue for one of two 1–10 line sequences. A suite of optional "quest addons" (battles, item trades, currency trades, and Pokémon trades) attach to the end of any compatible dialogue. A server owner can quickly build a talking npc, quest giver, or battler entirely from in-game editor variables, without writing any scripts.
The system is permission-driven, with every branch and every addon reading from and writing to LuckPerms. As such, dialogue state is visible to admins, scriptable from outside the NPC, and scoped per-player with no extra bookkeeping.
The two base dialogues
Simple Dialogue displays one of two configured lines. The active line is gated by a line_switch_perm. If the player has the perm, they see the alt line. Otherwise they see the default. After the line is shown, a seen_perm is granted. By default, this is the same perm that flips the switch, so the second visit reads as a follow-up:
First visit: "Hello, I'm Mary. Nice to meet you!" (perm granted on close)
Second visit: "Hey . How's it going?"
Long Dialogue does the same thing with 1–10 lines per branch. The lines are clicked through one at a time, default and alt branches are gated the same way, and a separate seen_perm per branch tracks completion. Empty line slots mark the end of the conversation, so if line 4 is empty, the conversation ends after 3 lines.
Both support {{npc}} and {{player}} placeholders everywhere, and both write through the same set_dialogue_interaction hook. As such, the optional quest addons treat them interchangeably.
The quest addons
Each addon is a separate behaviour added to an NPC that already has a dialogue behaviour. When the dialogue runs, the addon's button can appear at the end of it. The four addons available:
- Optional Battle: adds a "Battle" button. Has an optional
required_permgate, a configurable confirm dialogue, and hooks into the standard battle resolution callbacks. - Optional Item Trade: adds a "Submit Items" button. Configurable required item (or defined item), amount, completion command, completion script, completion perm, and a post-trade dialogue line.
- Optional Currency Trade: same shape, but takes Impactor currency instead of items. Defaults to
impactor:dollars. - Optional Poke Trade: same shape, but takes a Pokémon matching a configured species/aspect string.
Every addon shares the same three completion outputs: a perm is granted, an optional command runs, and an optional Molang script runs. As such, quest chains are straightforward to build. Completing a poke trade can grant a perm that unlocks the alt dialogue branch on a different NPC, which offers an item trade, which grants another perm, and so on.
After-dialogue extensions
Three additional behaviours fire after a long dialogue concludes, regardless of whether any quest addons were triggered:
- After Dialogue Command: runs a vanilla
/-command. - After Dialogue Script: runs a Molang script.
- After Dialogue Forced Battle: starts the standard force-battle flow as soon as the dialogue closes.
These are independent of the optional trades. A single NPC can offer a Pokémon trade and always run a command after the conversation, in either order.
Use cases
- Shopkeepers: long dialogue plus optional currency trade with a
givecommand on completion. - Quest givers: long dialogue with a perm-gated alt branch, plus an optional item trade that grants the next quest's perm.
- Battlers: simple dialogue plus an after-dialogue forced battle, plus a
battle_won_permthat switches the alt branch for next time. - Branching state across NPCs: chain seen-perms so a conversation on the other side of the map opens up new dialogue at home.
Why permissions
The dialogue system is intentionally permission-driven. Every branch and every quest addon reads from and writes to LuckPerms. This has three big advantages:
- State is visible to admins via
/lp user X permission info. - State is scriptable from outside the NPC. A Journey task completion can grant the perm that flips a dialogue branch, and vice versa.
- State is scoped per-player by default, and located in LuckPerms where it can be easily fixed if anything breaks.
It should be noted that the addons are also designed to be additive. An NPC can offer a battle and a trade and run a command afterward, and each one renders as its own button at the end of the dialogue. Composing rather than configuring keeps the variable surface for each addon focused on just that addon's behaviour.
Techy stuff
- Built on Cobblemon's dialogue, behaviour, and Molang systems, configured in JSON.
- Each addon is a standalone behaviour file declaring
add_variables. The "compatible with dialogue X" wiring lives in the dialogue init scripts, which checkq.npc.config.optional_<addon>_enabledand call the addon'scan_offer_dialogue_*script before adding the corresponding option. - Permission writes go through a shared
cobblemon:give_permhelper. Placeholder substitution usescobblemon:replace_placeholdersandcobblemon:replace_placeholders_var. - The
{{npc}}placeholder in perm defaults resolves to the NPC's identifier at runtime. As such, the same behaviour config produces unique perms per NPC instance without the server owner having to type them by hand.
Built for the Callisto and Cobblewilds Cobblemon servers, but available for commission.
Cobblemon Force Battle NPC & Stat Tracking
Three related Cobblemon behaviours. Moves to Players has NPCs move towards players within a certain range. Force Battle initiates battles with players that they are right next to and can see. Finally, Stat Tracking records wins, losses, and interaction counts on both the player and the NPC, so later behaviours can branch on the result (alt dialogue after first defeat, a different reward on the third visit, a rematch dialogue branch that scales with rematch count). Together they are the foundation for trainers on an adventure Cobblemon server and mimic the battle mechanics of the mainline Pokemon games.
Moves to Players and Force Battle
Add these behaviours to an NPC, set the 'enabled' flags to true, and the NPC starts scanning every 5 ticks for players inside 2 different ranges. When a player is detected in the movement range, the NPC will start walking towards them. If they get close enough, the NPC will stop and trigger a dialogue and then the battle. Detection uses q.entity.can_see, so the NPC needs actual line of sight, not just proximity.
A few details that make the behaviour usable in practice:
- Ignore perm: players with specified 'ignore perm's are skipped. The default is
npc.battle.won.{{npc}}_forced_battle, so once a player has beaten the NPC it does not re-trigger. - Battle-state gating: players already in a battle or another dialogue are skipped, so two force-battle NPCs in the same room do not fight over the same player.
- One target per tick: the first eligible player breaks the loop. As such, a crowd does not get sequentially yanked into back-to-back battles.
The pre-battle dialogue is configurable. Leaving it blank picks from a pool of generic taunts. After-battle dialogue, scripts, and commands are layered on through the after_dialogue_* behaviours, the same composable hooks the rest of the dialogue system uses. As such, a force-battle NPC can grant a perm, give a reward, or open a follow-up conversation when the player wins.
Use cases
- Wild trainers: the classic Pokémon trope, dropped into the world without writing any scripts.
- Gym leaders: pair with
battle_won_permto grant a badge perm on win, and the NPC stops triggering. Pair withoptional_battlefor a rematch button after the first defeat. - Ambush enemies:
force_battle_radiusof 8 or more with a hidden NPC makes a "you can't sneak past" choke point. - Tutorial fights: small radius, scripted party, generous afterparty rewards.
Stat tracking
The Track Battles behaviour is a one-toggle add-on. When enabled, every battle resolves into several datapoints:
times_wonandtimes_loston the NPC's data (lifetime W/L for the trainer).times_wonandtimes_lostfor this player against this NPC on the player's data, along withtotal_winsandtotal_losses(both in general and against NPCs).
A companion behaviour, Track Interactions, does the same for non-battle interactions. times_interacted lives on both the NPC and the player. Both systems write through shared cobblemon:update_npc_tracked_stat and cobblemon:update_player_tracked_stat helpers, so any future tracked stat can hook in without touching the battle code.
The scope lens query tool
The behaviour exposes a debug query: hold a Scope Lens (configurable item) with the npc.check_tracked_stats perm (also configurable) and right-click any tracked NPC. The chat prints:
[INFO]: NPC <uuid> has been interacted with N times.
[INFO]: NPC <uuid> battle record: W wins, L losses.
It is intentionally hidden behind both a perm and a held item, so admins can drop in to audit an NPC without exposing the query to regular players. Other systems can read the same q.player.data.tracked_stat.* values from Molang to branch on them. As such, a quest can offer a special reward if the player has beaten a specific NPC three times, with no extra scripts required.
Techy Stuff
- Built on Cobblemon's behaviour, dialogue, and Molang systems, configured in JSON.
- The force-battle scanner runs as an
add_tasks_to_activitytask onminecraft:idlepriority 0, throttled to every 5 game ticks viamath.mod(q.entity.world.game_time, 5). - Battle outcomes hook into Cobblemon's battle callbacks. Tracked stat writes go through the shared
update_npc_tracked_stat/update_player_tracked_stathelpers and persist viasave_data(). - The scope-lens query reuses the same
print_and_tellchat helper as the dialogue and animation-interaction systems.
Built for the Callisto and Cobblewilds Cobblemon servers, but available for commission.

Halloween Conkeldurr
A ghostly variant of Conkeldurr that haunts graveyards, dragging huge, cracked tombstones.
Originally made for the Halloween 2025 event on Roanoke Diamond.

Halloween Venusaur
A spooky variant of Venusaur with a huge Marigold on its back.
Originally made for the Halloween 2025 event on Roanoke Diamond.

Pinkan Weedle Line
Regional variants of Weedle, Kakuna, and Beedrill from Pinkan Island.
Originally made for the Fall 2025 Pinkan Island refresh on Roanoke Diamond.

Pinkan Poliwag Line
Regional variants of Poliwag, Poliwhirl, Poliwrath, and Politoed from Pinkan Island.
Originally made for the Fall 2025 Pinkan Island refresh on Roanoke Diamond.

Pinkan Pidgey Line
Regional variants of Pidgey, Pidgeotto, and Pidgeot from Pinkan Island.
Originally made for the Fall 2025 Pinkan Island refresh on Roanoke Diamond.

Pinkan Caterpie Line
Regional variants of Caterpie, Metapod, and Butterfree from Pinkan Island.
Originally made for the Fall 2025 Pinkan Island refresh on Roanoke Diamond.

Painted Mankey Line
Messy variants of Mankey, Primeape, and Annihilape that painted themselved to look more threatening.
Originally made Roanoke Diamond custom starters.

Thunderbird Zapdos
A mythological variant of Zapdos inspired by the great Thunderbird of legend, with sweeping storm-dark plumage.
Originally made for the Summer 2025 Texture Jam on Roanoke Diamond.

Hylian Aegislash
A heroic variant of Aegislash from a faraway land.
Originally made for the Summer 2025 Texture Jam on Roanoke Diamond.

Crystal Lapras
A glacial variant of Lapras with glowing crystals emerging from it's back and head.
Originally made for the Summer 2025 Texture Jam on Roanoke Diamond.

Pride Ho-Oh
A radiant variant of Ho-Oh with a iridescent plumage and bright rainbow feathers.
Originally made for the Pride 2025 event on Roanoke Diamond.

Knight in Shining Armarouge
A valiant Armarouge clad in gleaming white armor.
Originally made for the Spring 2025 Texture Jam on Roanoke Diamond.

Moon-Rabbit Diggersby
A cosmic variant of Diggersby with floating comet arms.
Originally made for the Spring 2025 Texture Jam on Roanoke Diamond.

Atlantid Relicanth
An ancient deep-sea variant of Relicanth with arcane mechanical markings.
Originally made for the Spring 2025 Texture Jam on Roanoke Diamond.
Crypt Raider Level
This project follows up on the previous: Unreal Engine 5 - Rocky Forest Environment. While designing that level I was focusing on tooling for landscape and foliage design. In contrast, this project was to design an almost entirely indoors and man-made location.
This level was created while following the gamedev.tv course Unreal 5.0 C++ Developer. I used a modular dungeon asset pack to build out the dungeon and crypt, and used a collection of boulder models to construct the cave interior. The level has interactable game elements in the form of objects you can pick up and move around. These grabbable objects are used in two puzzles: unlocking the secret spiral stair entrance to the cave, and leaving the cave crypt with the Holy Grail without triggering a trap!
I'm still finishing up the above course, and will likely have more UE5 projects to post here. Stay tuned!
Unreal Engine 5 - Rocky Forest Environment
The release of Unreal Engine 5 was momentous. With the dynamic LODs provided by Nanite and the automatic shadows/AO generated by Lumen, level design is easier than it's ever been. Inspired by these new tools, I set out to learn the basics of environment design in UE5.
This level was created while following the gamedev.tv course Unreal Environment Design. I started with a basic landscape brush pass, then blocked out the playable area using cliffs and rocks available on Quixel Mixer. Once the landscape and boundaries were in place, trees and foliage were placed and painted around the scene. Finally, a few unique assets and decals were added to give the centerpiece boulder more intrigue.
I'm really excited at the new possibilities UE5 brings. Look forward to similar projects posted here!
simpleterm
simpleterm is a bespoke fake terminal written in pure Rust. It lets you create a window with specified size, font, and colors, then display text in that window and get input from the user.
Each call to the terminal returns execution once some condition is met, so you can easily write a complex script of interactions with the user. The terminal functions even include methods to update the terminal's size, colors, and font on the fly!
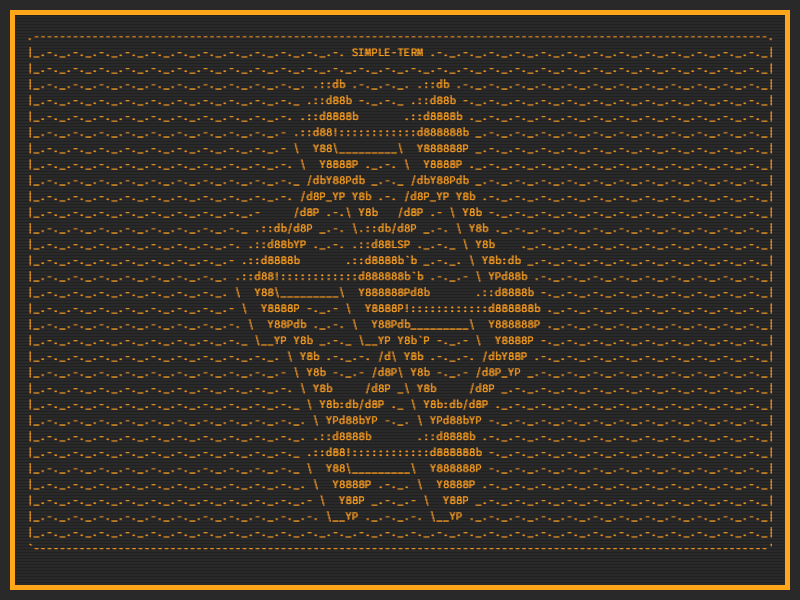
I told you to expect more Rust here — not a month later and I've got a second public crate! I started this almost immediately after finishing intfic after growing frustrated with the lacking support for terminal colors on Windows. By displaying my story in a custom window, I could ensure that it looked relatively the same across all operating systems.
So, in the interest of modularity I set out to make a fake terminal that did a few things very well, and I think I succeeded with those goals in simpleterm! I used piston_window as the backend and did run into some trouble with the way they process fonts and characters. For example, trying to load two sets of glyphs will crash the program unless you reload them right before use! I ended up only loading one at a time, and adding some code to toggle whether the terminal is in "text" mode or "art" mode.
Now that simpleterm is done, I'll be looking to incorporate it with intfic to create intfic_window, so stay tuned!
intfic
intfic is a framework that allows you to write a branching story with minimal code. It was made using pure Rust and uses a custom Story File Markup specification.
This was my first public Rust crate, and the first open-source project I've released in general! It came after months of learning Rust online with the official book.

To test my skills after completing the book, I set out to create a short narrative game where the player would run away from home and explore a mysterious land. Naturally I began to find building the tools to make the game much more interesting than writing the story itself, and intfic was the result! If I ever do get around to writing that story I can do it all with the Story File Markup system, including setting environment variables, having conditional text and options, and linking different files together from anywhere in the story.
This project was a great introduction to Rust's command line and parsing tools, and after everything I can safely say I'm a huge fan of the language. Look forward to many more Rust projects here in the future!
Relative Evil
"Relative Evil" was my submission to Shacknews Jam: Do it IV Shacknews. The theme of this jam was "Be Relatively Evil", and my goal for the game was to base it all around judging the relative "evil" of other people. At the end of the game the player has their own relative "evil" judged based on their choices. The classic trolley problem serves as a perfect framing to explore these comparisons; even more so when you have to decide very quickly!
This game was made in Unity, unlike my previous projects you may find on this site. I'm aiming to become more proficient in both, so expect my next project (a 3D exploration platformer) to also be in Unity! My favorite part of developing Relative Evil was creating a framework to fade sprites, UI Text, and UI Images on a strictly scripted schedule. Here I used it to show messages between each new scenario, allowing some of the elements to linger slightly longer for dramatic effect. I'll definitely be using the "fadeable" class I developed in other Unity games!
The art was also quite fun to create for this game. It was done entirely in Aseprite. I first created a perfect version of each sprite and then erased parts of the edges by hand different ways in different frames to give an illusion of lively movement. In combination with moving elements such as the eyes of victims and the wheel rod of the train cars this enhanced the game's style quite a bit without becoming unmanageable for a solo dev.
The music and sound FX for Relative Evil were produced entirely by Chris "Groovetone" Habeeb-Louks. He recorded himself playing trumpet and a variety of percussion instruments to achieve the unique jazzy feel of the game. Chris also produced the music for my previous game relation❤ships.
Story Trigger
"Story Trigger" was my submission to the Shacknews Jam: The Third, which had the theme "_____ with Guns". It's a short narrative experience framed like a D&D scenario where the player character somehow has a gun, inevitably messing up the dungeon master's plans quite a lot! I'll try not to spoil much but I urge you to check it out before reading on.
The game was made in UE4 using the FPS starter content. This time around I only made minimal adjustments to gameplay in favor of crafting a complete story. I began with an in-world screen that would display text and options similar to the terminal windows these sorts of games were first made on, and from there it made sense to construct a movie theatre environment for the player to move around in. The player interacts with the story by aiming at and shooting the option they wish to select.
Story Trigger centers around an unnamed character that either does not remember or does not think of their own past. The town merchant and nearby king both seem familiar with you, with the latter distinctly implying that you have saved the kingdom before. The main difference this time is that you, the player, have a gun. Nobody else in the world has ever heard of such a thing and many assume it is magical in nature. Unless told beforehand most would not even recognize it as a weapon. The result is that you are completely overpowered in your interactions with other people. What will you do when you always have the option to use unrivaled deadly force?
Back to the real world now, this is my favorite creation thus far. I've always been more gameplay and mechanics focused in game jams, for obvious reasons. With only a few days to make a game I tend towards finding something quick and satisfying to play, then polishing that with any remaining time. Crafting a complete story was really my only focus for this one. It was certainly more work than I had initially expected, due in large part to the branching narrative I was trying to achieve. For every decision I wanted the player to be able to make I also wanted some acknowledgement later on in the story, causing many seemingly simple interactions to turn into a mess of conditionals behind the scenes. The end result felt incredibly satisfying to me though, especially for the reactions of players as they experienced different parts of my story.
Another reason this game felt much more complete to me was the music by Melliflox. The main theme is quiet and relaxing, but transitions to a darker and glitchy version when the player shoots a character. I can't talk too much about the other tracks for fear of spoilers, but they contributed a ton to the vibe I was going for in my story and several players complimented the soundtrack specifically! Playing your game with music for the first time is often when it clicks and feels like a real thing you made, at least for me. I hope you try out the game, and please feel free to leave a comment or shoot me an email with your thoughts!
Dizzy Dreadnoughts
"Dizzy Dreadnoughts" was my submission to the 2 Button Jam. The core requirement of this jam was that the game must only accept two inputs. You can check out the game with the link below, or read on for some more info on how it was made!
Like my last game jam I used Unreal Engine 4 to make Dizzy Dreadnoughts. All pixel art animations were created in Aseprite and imported to UE4, where I sliced them into Paper2D sprites and set those up in Flipbook. To create the grid of tiles I simply aligned flipbook actors with the appropriate sprites in a grid formation. Every sprite was 32x32 to ensure proper pixel density and to allow for the tight control scheme.
The music was originally created by Joshua McLean (who was running the jam) and was available to all participants. I used one of his songs as-is and remixed the other two with Audacity to make my gameplay loop music. All other sound effects were generated using BFXR.
I learned a ton about pixel art animation and making 2D games in Unreal Engine. Please check out the game above and some screenshots below!
relation❤ships
"relation❤ships" was my submission to the 2019 Winter ue4jam. The theme of the jam was "All's fair in love and war".
The game features a heart-shaped spaceship that can shoot enemy heart-ships to destroy them, or shoot a special projectile to "bond" with them instead. Once bonded the heart-ship will roam around you and attempt to protect you from other enemy ships. You can form a new bond at any time, but watch out for your ex!
I had a blast making this game. Please check it out!
Lan War 35
Twice a year, the IU Gaming club holds a Lan War. STC (my department) sets up a lounge space nearby the main LAN hall. The "STC ARCADE" is aimed to be a nice short break from the intense PC gaming going on.
This time we iterated on the arcade emulator machines, adding a stacked monitor for a much better title screen. We also featured a new 3D printer, some Halo Xbox action, and old horror movies playing on the large-screen TV.
Below is a gallery of images from the event, as well as a poster and wallpaper I designed!
PowerShell - Setting Default Wallpaper
Setting the default wallpaper in Windows 10 using PowerShell seems pretty straightforward at first, but there are a few roadblocks to look out for.
Say you manage a large collection of machines, and need to set different wallpapers based on location, department, or even monitor size? Sure you could use GPO, setting different wallpapers for different OUs, but what if you want different wallpapers on machines in the same OU? In my experience, you can achieve much more granular control using PowerShell.
For instance, the following helper function will return true if the machine's wallpaper is "wide", which we define as having a width that is 2.2 or more times the height.
Detecting Wide-Screen Monitors
function wide_screen? {
    $vid_con = (Get-WmiObject -Class Win32_VideoController)
    $screen_info = $vid_con.VideoModeDescription -split "[^0-9]+"
    $screen_width, $screen_height = $screen_info | Select-Object -First 2
    $screen_ratio = $screen_width / $screen_height
    return $screen_ratio -ge 2.2
}
In my own collection machines have names containing their department and location info, and we save all that data in environment variables. Using these variables we determine exactly which wallpaper path to use. I say path because Windows 10 is tricky with the default wallpaper. If the monitor is a non-standard (1080p) resolution, then good old img0.jpg is not the default wallpaper. Instead an image most closely matching the resolution of the monitor in C:\Windows\Web\4k\Wallpaper\Windows will be used.
To ensure your custom wallpaper displays well on all monitors, you should generate versions of it at these named resolutions:
- img0_768x1024.jpg
- img0_768x1366.jpg
- img0_1024x768.jpg
- img0_1200x1920.jpg
- img0_1366x768.jpg
- img0_1600x2560.jpg
- img0_2160x3840.jpg
- img0_2560x1600.jpg
- img0_3840x2160.jpg
Then place those in a folder called 4k alongside your 1080p img0.jpg. The path to this collection of wallpapers (hopefully on a server!) is what we'll give to the following function:
Setting the wallpaper
function set_wallpaper($new_wallpaper_path) {
    $sysdata = 'C:\ProgramData\Microsoft\Windows\SystemData'
    $old_wallpaper = 'C:\Windows\Web\Wallpaper\Windows\img0.jpg'
    $old_4k = 'C:\Windows\Web\4k\Wallpaper\Windows'

    $new_wallpaper = "$new_wallpaper_path\img0.jpg"
    $new_4k = "$new_wallpaper_path\4k"

    if ((Get-FileHash $new_wallpaper).hash -ne (Get-FileHash $old_wallpaper).hash) {
        "`n  Removing old wallpaper..."
        get_ownership $sysdata
        make_old $sysdata
        make_old $old_wallpaper
        make_old $old_4k

        "`n  Setting wallpaper to $new_wallpaper..."
        Copy-Item $new_wallpaper $old_wallpaper -Force
        if (Test-Path $new_4k) { robocopy $new_4k $old_4k /E /XO /R:3 }
        "`n  Done!"
    } else {
        "`n  $new_wallpaper is already set as our wallpaper"
    }
}
So what is this doing? Let's break it down.
First off, I save variables for various system paths. Some of these we only use once, but saving them to a variable helps keep the code shorter and more readable.
The if statement checks to see if the current 1080p wallpaper is the same file as the new one we are trying to set, using hash. If the hashes match we go to the else statement and simply log that nothing was changed.
If the hashes don't match, we must be setting a new wallpaper. Here many encounter another roadblock in the form of SystemData. Systemdata, located at C:\ProgramData\Microsoft\Windows\SystemData, contains a cached version of the current wallpaper. This cached version is used on the lockscreen of the machine, and if you set a new wallpaper without also clearing SystemData, you'll have the old wallpaper on the lockscreen still!
To clear out SystemData I first call a helper to take ownership of it and grant full permissions for Administrators.
Get Ownership
function get_ownership($dir_path) {
    $dir_owner = (Get-Item $dir_path).GetAccessControl().Owner
    if (!($dir_owner -like "*Administrators")) { takeown /f $dir_path /a /r /d y }
    icacls $dir_path /q /t /c /grant 'Administrators:(OI)(CI)F'
    "`n  Granted rights on $dir_path"
}
Once that's taken care of it's simply a matter of renaming the old sysdata and wallpaper files to make way for the new ones. These 'backups' will only be as old as the last time you changed the wallpaper though, so it's a good idea to save the default Windows wallpapers before you set it to a custom one in the first place!
The regex used in my -replace statement is simply placing _old at the end of the file name while retaining the file extension after. It's a neat trick!
Save Old Version
function make_old($path_in) {
    if ((Get-Item $path_in) -is [System.IO.DirectoryInfo]) {
        $new_path = "$($path_in)_old"
        if (!(Test-Path $new_path)) { New-Item $new_path -type directory }
        Move-Item -Path "$path_in\*" -Destination $new_path -Force
    } else {
        $new_path = $path_in -replace '\.(...)$', '_old.$1'
        Move-Item -Path $path_in -Destination $new_path -Force
    }
}
I hope you found this article useful. If you encounter any problems with the code above or if it helped make your life a little easier, feel free to reach out!
Vectra City / Video Vortex
Vectra City is a class based deck-building game for two players. It's set in a neo-noir world where the shattered sun is perpetually setting on the horizon, constantly shifting colors.
I was a co-founder of the game along with Mitch Ryckman. Mitch was the head designer of game mechanics and balance, while I provided game design ideas and all the graphic design work needed to attract publishers.
In August 2018 we took our work to GenCon, with playtesting sessions and a publisher "speed-dating" event lined up. In preparation for this we commissioned an original piece by the extremely talented Ed Mattinian, which I used in our sell sheet and several other promotional materials.
Here's some of my graphic design work for Vectra City:
Note: the character art in these is all placeholder, except for our commissioned piece.
GenCon was a massive success! We got tons of helpful info from playtesters, but more importantly we struck a very generous publishing deal with Mondo Games. The game was released as Video Vortex in Q1 2020! Official BGG page here.
Lan War 34
Twice a year, the IU Gaming club holds a Lan War. The past few times, my department has sponsored the event by providing technical assistance, 3D-printed trophies for the tournaments, and by being in charge of the lounge near the main hall.
Our goal with the lounge is to provide a space where gamers tired of sitting at their own machine in the crowded main hall can come to relax, or try some novel play experience. This latest Lan War I think we achieved this exceedingly well. The theme was an arcade from the 80's, complete with classic games such as Teenage Mutant Ninja Turtles and Joust, a modern version of PacMan, and a newer arcade FPS called Devil Daggers.
The other main experience involved two immersive driving simulator setups, with triple curved monitors around the user and a steering wheel/pedal combination to control. The game of choice for this experience was WreckFest, a racing game featuring cockpit-view and realistic car damage.
We also sponsored a Hearthstone Fireside gathering for the second time, allowing any nearby players to try a new gamemode and unlock the warlock hero Nemsy Necrofizzle. Additionally, Mitch and I had a playtest of Vectra City set up.
To top it all off, one of my coworkers edited together 80's movies with iconic 80's commercials and music videos between them. The STC Arcade was a huge success, with people coming all night to check out the games, try for a high-score, or relax and watch a classic movie. Below are some pictures from the event space, as well as some graphics I designed to advertise it.
P423 Compilers
My very last class at Indiana University was P423 - Compilers. It was a project course, with the goal of the semester being the construction of a Racket compiler that supported functions.
We broke this difficult task into easier steps, each one translating an intermediary language to something a bit closer to the assembly. Along the way we implemented conditionals, vectors, static and dynamic typed data, and finally user-defined functions.
Our final project was to build on our compiler in a novel or useful way. I chose to focus on optimization of the input code, aiming to produce simpler assembly programs in less time. Check out my final presentation.
Phi Kappa Chi
Phi Kappa Chi was a project I worked on as part of Hoosier Games. It was to be an RPG where you, the protagonist Scotty, are a new pledge for the fraternity PKC. Things go awry when your frat is banned from the campus, and you must conquer the other fraternities to fix things.
The game was heavily inspired by LISA, and would have featured black comedy as a central storytelling element. I served as the project's only developer and was teaching myself Unity as we went.
Ultimately, I think we made good progress for a single semester. The biggest triumph for me was creating a classic RPG battle system from scratch. You can find a video of an older demo in action here and I have some slightly newer screenshots below.
B355 Robotics
I took a basic course on robotics in 2015. We built simple machines with metal and plastic parts, including a microcontroller, gears, motors, servos, and a variety of sensors. We programmed the bots with RobotC.
Labs built up to two main tasks: maze traversal and inverse kinematics PID control. Below you can find a gallery of images I took while building our maze traversal bot. The IK bot can be seen in action here.
P317 Code Entropy
I took an Information Theory class back in 2013. Here's a synopsis of my final project.
Entropy is a measure of disorder. In hard sciences, it can be quantified to describe the number of possible states a system can be in. In information theory, entropy can be quantified in a similar way as the amount of information that can be acquired by observing the state of a system. A static system will have entropy zero; an un-weighted coin flip will usually have entropy around 1 bit.
Finding the entropy of natural language has certainly been done before. Any string of words may be treated as a list of characters. In turn, the probability of each character can be measured and the entropy can be found based on Shannon's equation. However, code is not natural language. We may type it character by character, but not every character is considered equal when the computer interprets our program. The largest difference is that words using alpha-numeric characters may be grouped together. As a whole, any word and most punctuation in programming languages can be referred to as a "token". A token is essentially any object that can be interpreted by the computer. It is the smallest possible unit that is significant in code, thus it is the smallest possible unit with which we should measure the entropy in code.
My task became clearer at this point. To find the entropy of a program, I first had to tokenize it and collect a list of all the tokens. Here's the function in charge of making that list:
def tokenize(byte):
    global token
    if byte == ' ' or byte == '\n':
        if token != '':
            tokens.append(token)
        token = ''
    elif byte in string.punctuation:
        if token != '':
            tokens.append(token)
        tokens.append(byte)
        token = ''
    else:
        token += byte
Once I iterated through the entire list, the entropy of the list of tokens could be calculated based on each member's conditional probability. Following is the formula for Shannon Entropy:
def entropy(list):
    entropySum = 0.0
    seen = []
    for x in list:
        if x not in seen:
            probability = list.count(x) / len(list)
            entropySum += probability * log2(probability)
            seen.append(x)
    return -entropySum
Full source code can be found here.
It is interesting to note the varying effects that tokenizing a string can have on its entropy. For instance, if one takes the entropy of a relatively simple program without tokenizing it and compares that to the tokenized entropy, it's likely that the tokenized entropy will be lower. This is because a tokenized string will have less members than one in which every character is considered independent. However, the more complex a program gets, the greater the tokenized entropy will be, eventually far surpassing the un-tokenized entropy. This is due to the number of possible characters being far lesser than the number of possible combinations of those characters. This allows for entropy to follow vocabulary linearly in very long or complex code, whereas normal methods for calculating entropy of a string would follow a more logarithmic pattern as the code grows in complexity.
To compare the entropy of different languages, one should use code that accomplishes the same task. For example, here's the 'reverse string' program in each of the languages I analyzed:
Brainfuck reverse string
,----- ----- [+++++ +++++ > , ----- -----]<[.<]+++++
C++ reverse string
int main() {
    std::string s;
    std::getline(std::cin, s);
    std::reverse(s.begin(), s.end());
    std::cout << s << std::endl;
    return 0;
}
Java reverse string
public static String reverseString(String s) {
    return new StringBuffer(s).reverse().toString();
}
Python reverse string
string[::-1]
Scheme reverse string
(define (string-reverse s)
  (list->string (reverse (string->list s))))
Haskell reverse string
reverse = foldl (flip (:)) []
I chose these languages to represent a broad spectrum of programming languages, but if research is to be taken further it may be wise to increase the scope of the languages analyzed. My general hypothesis followed that the languages could be ordered according to ascending complexity/entropy: Brainfuck, Scheme, Haskell, Python, Java, C++. To test this, I analyzed code from each language across several tasks. I used Rosetta Code as a database to find standardized examples of different tasks in each programming language.
Results
| | Hello World | Reverse String | Bubble Sort | |:--------- | -----------:| --------------:| -----------:| | Brainfuck | 1.85 | 2.05 | 2.59 | | C++ | 4.28 | 4.40 | 5.48 | | Haskell | 2.95 | 3.10 | 4.23 | | Java | 4.50 | 3.76 | 4.80 | | Python | 2.95 | 2.52 | 4.39 | | Scheme | 2.25 | 3.01 | 3.59 |
The results roughly supported my hypothesis, with Brainfuck and Scheme being less complex, C++ and Java being more complex, and Python and Haskell sitting around the middle. I'd be interested to see if this trend would continue when vast amounts of code are analyzed, including standard libraries.
And there you have it, my little foray into Information Theory. It was one of my favorite classes so I hope you found this project interesting!